

How To Install A Plate Heat Exchanger On A Hot Water Tank
Posted by JEFFREY LUFF
In this iteration of Alternative Heating & Supplies' tips and tricks, we will discuss how to install a plate exchanger on top of a domestic hot water tank. Our heating specialists explain why plate heat exchangers are important, how are they used and how to install them to heat your house.
What Is A Plate Heat Exchanger And How Does It Work?
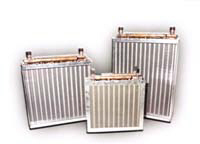
A plate heat exchanger is a device installed on top of a domestic hot water tank that extracts heat from a wood boiler and distributes it throughout the rest of the property. Hot water from the boiler flows through one set of channels, while cold water flows through another set. These fluids flow in opposite (counter-flow) directions, allowing the plate to transfer heat from the hot fluid to the cold water with high efficiency.
They're commonly used in outdoor wood-burning boiler setups because they improve heat-transfer efficiency and help maintain high temperatures without requiring large water storage.
When You Might Need A Plate Heat Exchanger
Think you could use a plate heat exchanger? Here are some ideal use cases:
- You have an outdoor wood furnace: The component helps transfer heat from the boiler loop to the domestic water tank.
- You live in a high-demand household: Plate heat exchangers can provide rapid heating and maintain a steady supply of hot water. If you find your home running out of hot water quickly or experiencing frequent temperature fluctuations, a plate heat exchanger is likely a worthwhile investment.
- Properties with space constraints: Plate heat exchangers are compact and installed on top of the hot water tank, ideal for mechanical rooms, crawlspaces or other areas where space is at a premium.
Plate heat exchangers can also offer energy-efficient improvements. Specifically, it can improve efficiency by up to 5 times compared to a conventional shell-and-tube or internal-coil heat exchanger.
Tools And Materials Needed For Installation
Installing a plate heat exchanger is a relatively simple DIY task that requires some basic tools and hardware, including:
- The plate heat exchanger part
- PEX or copper piping
- Fittings, valves and clamps
- Pipe insulation
- Basic tools (i.e., a wrench set, pipe cutter, etc.)
Know The Setup Before You Start
Before you start installation, it's important to understand the setup of your boiler, hot water tank, and how your plate heat exchanger fits between these two appliances.
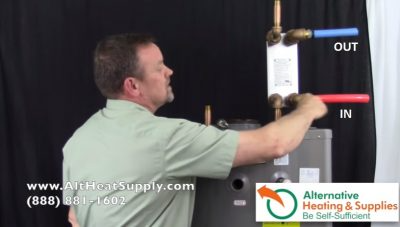
A plate heat exchanger separates the primary heating source (boiler) from the secondary side (domestic water) to allow efficient heat transfer. The primary side connects to the boiler and enters the exchanger in a counter-flow arrangement, while the secondary side connects to the cold-water inlet and the hot-water outlet of the hot-water tank. The boiler water and domestic water flow in opposite directions to maximize heat transfer efficiency.
What Size Should the Plate Exchanger Have?
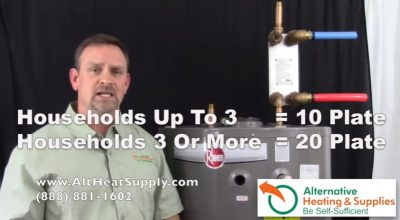
Many customers ask, “how do you know what size plate exchanger to install in your domestic hot water tank?” A simple rule of thumb is 2 to 3 people in one house will determine a 10 plate. A 10 plate heat exchange is enough for 2 and 3 people. When you get into a full sized family, anywhere from 4, 5, 6 people in the house; we immediately recommend the 20 plate. It will have plenty of power, and it will have great regenerative nature to it, so it'll heat up the domestic hot water a lot faster.
The Plate Heat Exchangers Use and Applications
The plate exchangers can be used for many different applications, anything from cooling or heating and warming up diesel to exchanging heat between polyurethane and a refrigerant. However, the heat exchangers that we have made is created specifically for the wood boiler application. Essentially, it's a much heavier grade of plate exchanger, which hurts the efficiency a little bit but has the longevity and the quality instead of having to replace it every 4 or 5 years. We went with a heavier grade and they will last you the lifetime of the boiler, if not longer.
Step-By-Step Guide To Installing A Plate Heat Exchanger
Step 1: Turn Off Power And Water Supply
First, turn off the power and water supply to ensure you're working in a safe environment. In some cases, you may need to drain the tank.
Step 2: Mount The Plate Heat Exchanger
Next, you'll mount the plate heat exchanger. Position it vertically to allow proper venting, and make sure it's installed so it's easily accessible for maintenance.
Step 3: Connect The Boiler Side Lines
After it's mounted, connect the supply and return connections, ensuring proper flow direction.
Step 4: Connect the Domestic Water Side
Connect the domestic water side to the tank's cold-water inlet and hot-water outlet.
Step 5: Install Valves And Unions
Shut-off valves are crucial for maintenance purposes. Specifically, they allow the exchanger to be maintained, cleaned, or replaced separately from the system, without shutting down the entire water heating system.
Step 6: Check For Leaks And Test The System
Turn the system back on and look for leaks or any other issues. Plate fouling, gasket failures, and internal cross-contamination are all problems to watch for during testing.
Plate Exchanger Installation Instructions
When connecting a plate heat exchanger, a common question is where it should tie into the system between the supply and return lines. Connecting it to the cold-water supply in the domestic hot water tank is the best option.
Common Mistakes To Avoid During Installation
Some common mistakes to avoid during heat exchanger installation include:
- Incorrect water flow direction
- Skipping the installation of valves or unions (be sure they are lead-free)
- Poor or incorrect mounting placement
Tips For Improving Efficiency And Performance
Looking to maximize your plate heat exchanger investment and improve efficiency and performance? Tips include:
- Sizing the heat exchanger properly
- Insulating the pipes
- Ensuring consistent flow rates
- Routinely checking the system
Maintenance and Long-Term Care
Maximize the return on investment of your plate heat exchanger with these maintenance suggestions:
- Flush the heat exchanger: If you notice a drop in performance, flush it. Do this every six months by flushing water in the opposite direction to remove any debris or buildup.
- Regularly check the plate for leaks. Monitor gaskets for signs of cracks or hardening.
- Note any signs of reduced efficiency, such as temperature swings, pressure drops and failure to reach the target outlet temperature. Most issues can be resolved by cleaning, but if problems are too significant, replacement may be necessary.
Frequently Asked Questions
How Do I Know What Size Heat Exchanger I Need?
The size of the heat exchanger should be determined by the number of people in the household. For instance, if there are 2-3 people in the household, a 10-plate heat exchanger should suffice. If your household has three or more people, consider a 20-plate exchanger.
Will This Work With My Existing Hot Water Tank?
Yes, Alternative Heating & Supplies plate heat exchangers are designed to work with most hot water tanks.
How Long Does Installation Typically Take?
Installation typically takes 2 to 4 hours.
Do You Heat The Domestic Hot Water, The Boiler or Hot-Air Furnace First?
You should always heat the domestic hot water first, then the boiler and the hot-air furnace.
Need Help Choosing The Right Parts?
Alternative Heating & Supplies carries plate heat exchangers compatible with every hot water tank. If you need help selecting or installing a heat exchanger or with any accessories, contact us today.
