

How to Build Your Own Outdoor or Indoor Wood Boiler [Step-by-Step]
Posted by SEBASTIAN ZOTA
Thinking of building your own outdoor or indoor wood boiler? You’re in the right place. At Alternative Heating & Supplies, we’ve helped thousands of DIYers design, build, and fine-tune custom boiler systems that work. But before you start cutting, welding, or plumbing, there are some key concepts and steps you need to understand to avoid costly and dangerous mistakes.
In this guide, we’ll walk you through the critical components, mistakes to avoid, step-by-step construction, and how to set yourself up for long-term performance and safety.
Step-by-Step Guide to Building and Assembling the Boiler
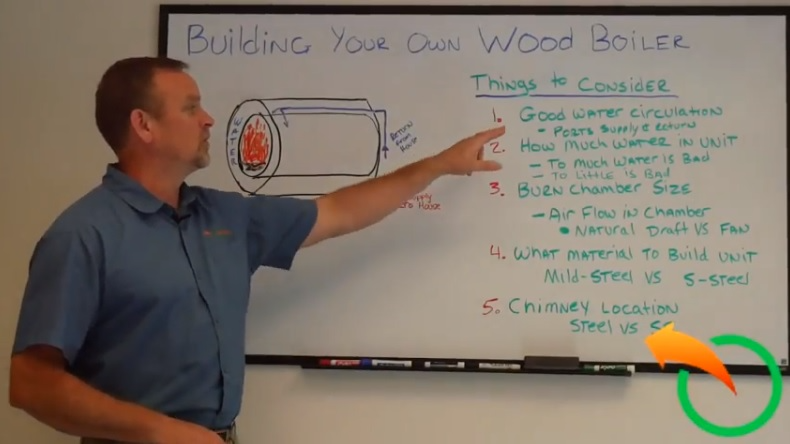
Learn how to avoid the usual mistakes that are connected with the following boiler parts:
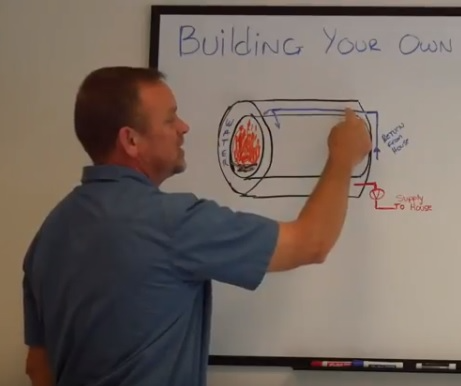
- The water circulation inside the wood boiler
- The quantity of water that is recommended to use
- The burn chamber size
- What materials to use for building your wood boiler
- The chimney location
Prepare the Firebox and Boiler Vessel
- Most DIYers use old propane tanks, barrels, or oil tanks for the main vessel and burn chamber.
- Use mild steel over stainless steel. It expands more uniformly under high heat and is used by most major manufacturers.
- Ideal burn chamber size: 3–4 feet deep and wide, especially for homes up to 4,000 sq. ft.
Fabricate and Installing the Water Jacket
- Design your water jacket to fully surround the burn chamber to maximize heat transfer.
- Add cross tubes or metal fins to improve surface area inside the water tank.
Welding, Sealing, and Pressure Testing Safely
- Use professional-grade welds on all water-bearing parts.
- Perform a low-pressure hydro test to check for leaks before lighting any fire.
- Seal chimney connections with high-temp silicone to prevent moisture and creosote damage.
Install Pumps, Valves, Gauges, and Controls
- Use your main system circulator pump to move water inside the boiler and out to the house.
- Install pump at the lowest port for better pressure equalization and to avoid cavitation.
- Keep the pump outside the house to reduce noise and improve cooling.
Connect to Your Home Heating System
- Use insulated underground PEX (Cross-linked Polyethylene) pipe to prevent heat loss over distance.
- Supply should pull from the bottom of the water jacket (not the top), to ensure complete mixing and avoid stratification.
Chimney Installation and Draft Optimization
- Install chimney at the top rear of the unit with a baffle below to capture and redirect heat.
- Always use Class A stainless chimney pipe to prevent creosote corrosion and rot.
- Avoid top-down chimney installations inside the firebox—they reduce usable space and airflow.
Installing Your Wood Boiler
Proper Site Setup:
- Pour a level concrete pad with proper drainage around the unit.
- Make sure to set below the frost line to prevent shifting.
- Keep at least 5–10 feet clearance from buildings and structures for safety and maintenance.
Underground PEX Tips:
- Choose pre-insulated PEX for better energy efficiency.
- Run through PVC conduit for added protection.
- Seal all joints and entry points with spray foam or silicone to prevent water and heat loss.
Common Problems and How to Prevent Them

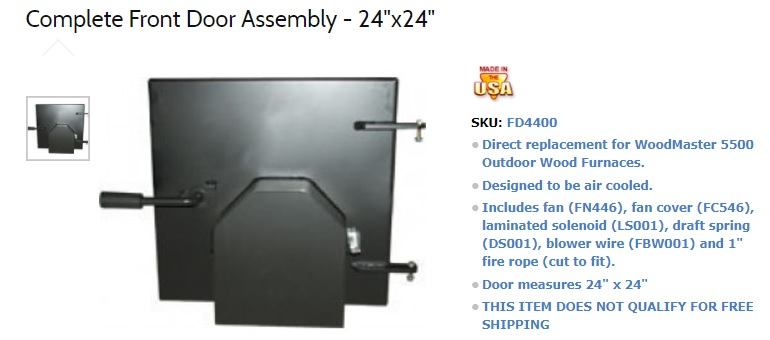
DIY Boiler Kits and Components That Make It Easier
If you’re serious about building a reliable unit, don’t reinvent the wheel. We offer pre-built kits with the parts you’ll need to build smarter, safer, and faster:
Final Thoughts on Building a Wood Boiler Safely
Building your own wood boiler is absolutely doable, but you’ve got to approach it like a pro. Circulation, airflow, materials, and recovery are the four pillars of efficient DIY boiler design. Use the right parts. Think critically about layout. And always follow local codes and safety requirements.
Need help getting started? Check out our DIY kits, watch our YouTube tutorials, or give us a call. We’re happy to point you in the right direction.
