

How to Clean & Treat Your Outdoor Wood Boiler for the Heating Season
Posted by JEFFREY LUFF
This is another Alternative Heating & Supplies episode and in this blog post we are going to talk about the water that has been in the unit for the whole season. This can be done in the spring and the fall. Learn what products to use, how to drain the system and how often should you clean your furnace.
Cleaning your outdoor wood boiler before the heating season is absolutely necessary. Leftover ash, untreated water, and buildup can quietly reduce your boiler’s efficiency, eat away at the system from the inside, or worse… lead to a breakdown in the middle of winter. In this post, our heating experts are going to walk you through exactly how we prep our own boilers every year: from flushing the system to using vinegar, adding treatment, and double-checking critical components.
Whether you’re a longtime boiler owner or new to this kind of maintenance, these steps will help you protect your investment and keep the heat going strong all winter.
Supplies and Setup
Before you begin, gather everything you’ll need. Having the right supplies on hand can make a big difference and save you time mid-process.
Materials You'll Need:
- White vinegar (about 3 gallons, depending on buildup)
- CF-205 Cleaner/Flush
- AmTech 300 – boiler treatment (2 levels of protection)
- ProTech 300 – boiler treatment (3 levels of protection)
- Fire Rope
- Fan Cover (replace every 1–2 years)
- RTV Silicone
- Test Kits
- Protective gloves and goggles
- Small shovel or ash removal tool
Safety Tip: Always shut off power, let the unit cool, and wear gloves and eye protection. This stuff gets hot, and it’s just not worth the risk.
1. Drain the System
The first step is to drain the old water from your outdoor wood boiler. This removes the used, dirty water so you can start fresh with a clean fill. Draining helps eliminate any surface debris or minor buildup that can affect system performance over time. Once the boiler is empty, you’ll be ready to begin the flushing and cleaning process in the next step.
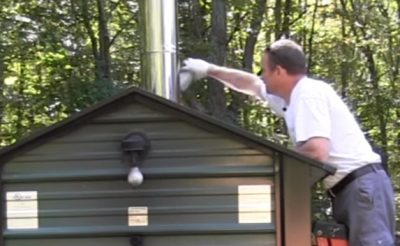
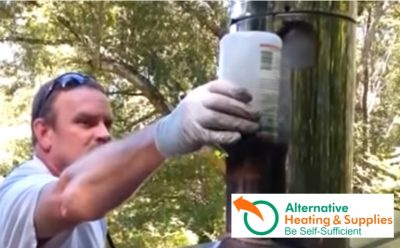
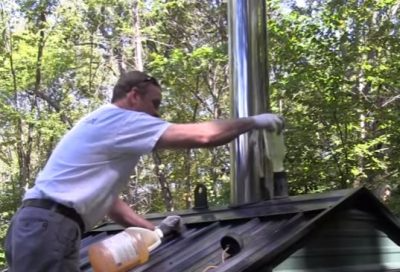
2. Add Flush and Vinegar
After draining the old water, refill your outdoor wood boiler with fresh water to begin the flushing process.
- Pour in CF-205 cleaner, a flush designed specifically for heating systems, to help remove sediment, scale, and buildup from the lines and components. This step ensures the system is fully cleaned before adding new treatment.
- Note: The boiler water must be heated to at least 120°F for the CF-205 to activate properly.
- Once the boiler reaches temperature, add up to 3 gallons of regular white vinegar. The vinegar boosts the cleaning power of the flush, helping dissolve mineral deposits and organic residue inside the system.
- Let the circulator pump run for approximately 4–8 hours so the cleaning solution can circulate through all parts of the system. Do not exceed 8 hours—because the solution is acidic, extended circulation could damage components.
How much vinegar should you use?
If you clean your boiler yearly, 1 gallon is usually enough. If it’s been a few years, go for 3 gallons. Somewhere in between? Use 2 gallons.
This simple combo helps break down years of internal buildup and can seriously improve system flow and efficiency.
3. Inspect and Replace Key Components
While the vinegar’s working through the system, take time to inspect the following:
Replace the Fan Cover
- Keeps air from getting in when it shouldn't.
- If it’s more than a year or two old, just replace it.
- Check out our YouTube Video for assistance
Replace the Fire Rope
- Pull out the old gasket rope around the door.
- Clean the groove thoroughly with a wire brush before installing the new one.
-
Pro tip: Don’t pull it too tight; it needs a little give to seal properly.
Final Inspection & Prep for the Heating Season
Check Everything Before You Fire It Up
Once the system is flushed and cleaned, double-check:
- All components are fully reassembled
- No leaks or gaps in the door seal
- Treatment has been added correctly
Add Boiler Treatment
Once the system has been circulated for a maximum of eight hours, with Cf-205, drain the water and refill. Now you're ready for the boiler treatment.
Here’s how I handle water treatment based on system size and condition:
- Use AmTech 300 for basic protection (2 levels)
- Go with ProTech 300 if your system needs stronger corrosion control (3 levels) or just want to protect their boiler better
Each treatment has been tested across almost all boiler systems, but most modern setups use ProTech 300 (nitrite-based) or AmTech 300, which provides solid protection while being a bit easier on the environment.
Always test your water after 24–48 hours to make sure treatment levels are correct.
You can safely add the boiler treatment at any time, there’s no need for the system to be up to temperature. However, the corrosion protection doesn’t activate until the boiler reaches operating temperature, so once you fire it up (even if it’s weeks later), the treatment will begin working to protect your system.
Our Protech 300 and AmTech 300 come in 1 gallon bottles and both treat 300 gallons of water.
Run a Test Cycle
Before running a full burn, start with a short test cycle. Listen for unusual sounds and check for leaks. If all looks good, continue as normal.
Why This Maintenance Matters
I’ve been doing this for a long time, and every fall, without fail, I hear from someone who skipped a step and ran into issues halfway through the season.
Let’s be honest, wood boilers aren’t cheap, and neither are replacement parts. A bit of maintenance now can save you hundreds later. Here’s what you get out of it:
- Your system runs smoother and uses less fuel
- Heat exchangers and pumps last longer with proper cleaning
- Fewer chances of overheating or leaks
And if you’ve ever had to troubleshoot a dirty boiler on a 10-degree morning, then you know it’s not worth it.
Quick Recap
Let’s run through the big takeaways:
- Drain the system
- Flush the system (Our CF-205 is perfect for this)
- Use vinegar + CF-205 to break down sludge
- Clean out ash
- Replace fan cover and fire rope
- Add the right treatment (AmTech or ProTech)
- Test everything before the first fire
Want to make this even easier? Grab one of our DIY Kits and get everything you need in one shot.
Your Turn
If you've got a method that works well for your setup or a question we didn’t cover, leave a comment on the YouTube video where we walk through this process step by step.
We check those comments regularly and are happy to bring more clarity if you’re unsure about anything.
And hey, if this post helped you out, consider subscribing to the channel for more hands-on maintenance tips. You can also check out our test kits to keep things running smoothly all season. Still have questions? Give us a call and see how we can help
We maintain and service outdoor wood boilers every day. We probably have the part you’re looking for. Don’t hesitate to give us a call or browse our full parts catalog.
Stay warm out there.
